Managing Object Storage via Dashboard
The most basic way to manage Object Storage is by using the Zetta.IO Dashboard.
In this tutorial we will show you the basics of how to create new containers and upload files.
First ensure that you have enabled the Object Storage service for your project in the Services page of the dashboard.
Please note that there are limitations to the functionality exposed by the dashboard:
- Maximum file size of an object is 500Mb.
- All containers are created with the "Standard" storage policy.
- You can not configure options for the static web plugin.
- You can not configure temporary URLs.
- You can not configure Access Control Lists. Containers are either Private or Public. Public containers have directory listing enabled.
To use these more advanced options you must use the commandline swiftclient, the API directly or a supported third-party library or tool.

Creating your first container
Unlike files, objects are not organized in a hierarchy. Every object exists at the same level in a flat address space called a container.
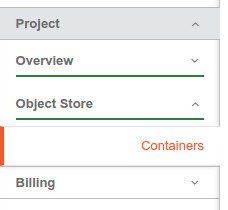
- Access the Dashboard and expand the "Object Store" panel. Select the Containers menu option.
You will now get a list of all your containers.

- Select the "Create Container" button to bring up the "Create Container" dialog.
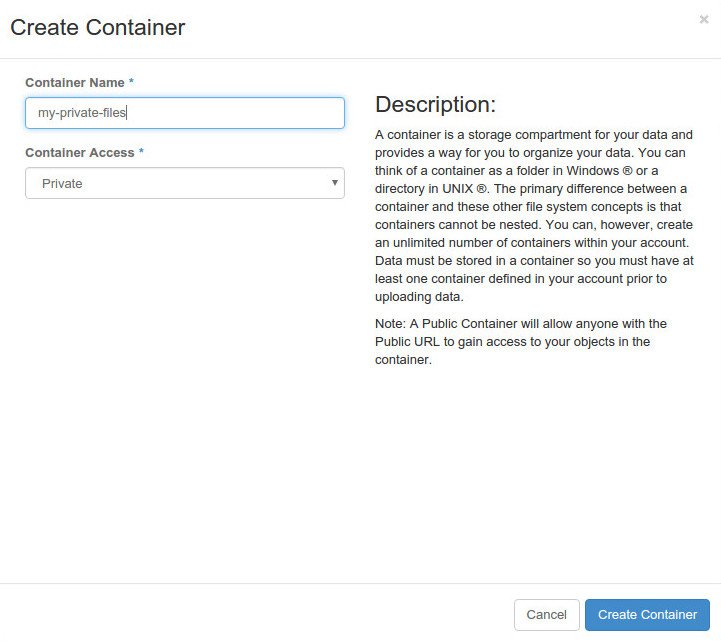
Write in a name for the container and set "Container Access" to "Private". Click the "Create Container" button to create the container.
- You will now be returned to the "Containers" screen. The container you created is listeded in the left pane. Files in the selected container will show up in the right pane.

Uploading your first object
All objects (files) are available via a unique URL from the whole internet. Private containers requires a valid user to enable access.
Objects can be of virtually any size, but large objects (5Gb+) might require you to use features like "Static Large Objects" or "Dynamic Large Objects" to segment them during the upload and download process.
- Select the active container by clicking the name in the left pane. Click the "Upload Object" button to bring up the "Upload Object" dialog.
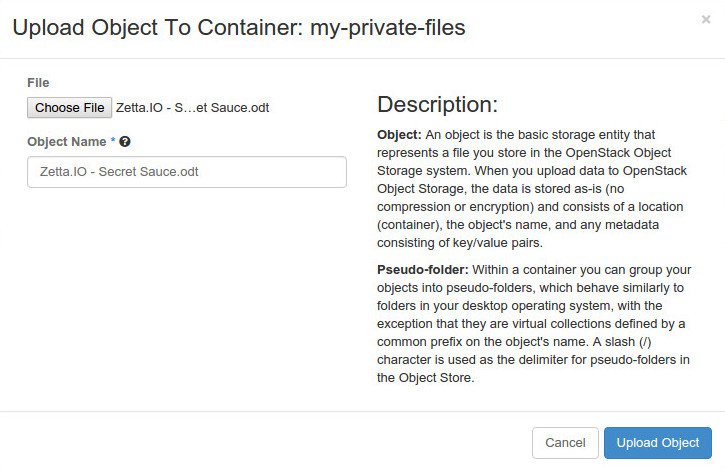
Press the "Choose File" button to bring up a file selector and select a file you want to upload.
If you want to change the name of the object, you can do that here. If you prefix the name with a foldername and a /, you will place the object into a pseudo-folder.
- After the upload process has finished, you will see that the object is now available.

Create a Public container and copy a file
Access to objects in containers are controlled via the access control list of the container. Folders created with the "Public" access control list (.r:*,.rlistings) allow reading files from anywhere without authentication, and listing all objects in the container. To disallow listing objects, remove the ".rlistings" option from the Read ACL from the Swift client.
We will now create a Public container, and make a copy of the previously uploaded object in the "my-private-files" container.
- Select the "Create Container" button to bring up the "Create Container" dialog.
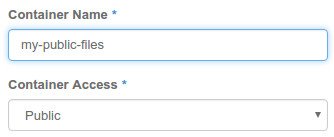
Write in a name for the container and set "Container Access" to "Public". Click the "Create Container" button to create the container.
- Navigate to the file you previously uploaded in the "my-private-files" container.
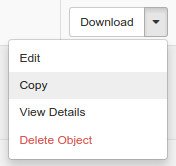
Select the "Copy" option from the dropdown in the right pane to bring up the "Copy Object" dialog.
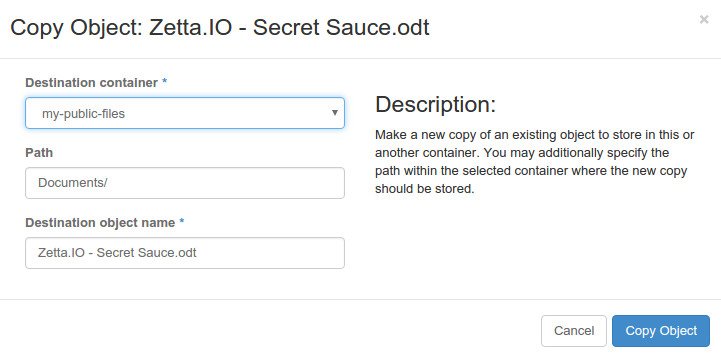
Set the "Destination container" to "my-public-files".
We will also set the "Path" to "Documents/" to place the copied object into a new Pseudo-folder in the destination container.
Click the "Copy Object" button to start the copy process.
- The object is now available for everyone.

To get an XML document with a list of all objects in the "my-public-files" container, click the "Public" hyperlink in the container list in the left pane.
To get the Public URL for the Container, click the "View Details" button in the container listing.
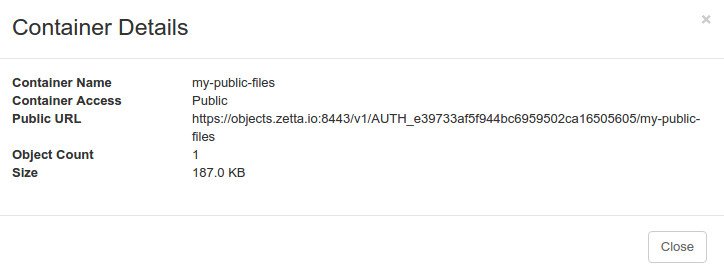
The container and its content is available both over HTTP and HTTPS.
The objects in the Public container can now be served directly to users from your web application.